


Testing a circuit breaker with a multimeter can help identify whether the breaker itself is functioning as intended. This guide addresses common questions and walks through the process step by step. (Note: If you've never used this tool before, we recommend reading our How to Use a Multimeter: Multimeter 101 Guide for Beginners before getting started). Readers may jump to specific sections, but reading the full article is recommended for a more complete and safe understanding.
Why Test a Circuit Breaker?
A circuit breaker is designed to automatically shut off power when a circuit becomes overloaded or develops a fault. But a failing breaker does not always trip dramatically. In many cases, it may appear normal while quietly preventing power from reaching a circuit.
Under normal conditions, a breaker acts as a closed switch, allowing current to flow from the incoming power line to the outgoing circuit. When switched ON, it should deliver full line voltage. When switched OFF, it should cleanly open the circuit and stop the flow of electricity.
Over time, internal components can wear out, contacts can degrade, or the mechanism can fail altogether. As a result, a breaker may remain in the ON position but no longer deliver power downstream.
Testing a breaker with a digital multimeter allows you to verify two critical conditions:
- whether it is supplying the correct voltage when turned on
- whether it maintains proper continuity between its terminals when de-energized
A breaker that fails either test should be replaced.
Testing a circuit breaker may expose you to live electrical voltage.
- Wear insulated shoes and avoid working in damp or wet conditions.
- Use a digital multimeter rated CAT III or higher.
- Inspect test leads for damage or exposed metal before use.
- Never touch bare conductors or terminals with your hands.
If you are unsure about identifying live wires, working inside a panel, or interpreting readings, stop and consult a licensed electrician.
Tools for the Job
To test a circuit breaker, you will need:
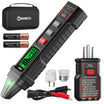
- A digital multimeter
- Non-contact voltage tester
- Roll of painter’s tape
- Insulated screwdriver
- Insulated gloves
Preparing for the Test
Proper preparation improves both safety and accuracy.
1. Disconnect all loads
Unplug or turn off appliances, lights, and devices connected to the circuit you plan to test. This helps prevent misleading readings and unnecessary tripping.
One of the most common reasons a circuit breaker trips repeatedly is circuit overload rather than breaker failure. After disconnecting all loads, reset the breaker and observe its behavior.
If the breaker remains on and operates normally with no load connected, the breaker is likely functioning correctly. In this case, redistributing appliances to other circuits or reducing the load may resolve the issue without replacing the breaker.
2. Identify the correct breaker
Use the panel directory to locate the breaker serving the circuit in question. If the labeling is unclear, take additional steps to confirm the correct breaker. A separate guide on how to identify the correct circuit breaker may be helpful.
3. Mark the breaker
Use painter’s tape to mark the breaker being tested. This helps avoid confusion, especially in crowded panels.
4. Remove the panel cover
Using an insulated screwdriver, remove the breaker panel cover. Once the cover is removed, keep hands clear of any exposed wires or terminals.
5. Visual and Mechanical Inspection
Before the formal test, perform a manual check. A healthy breaker should click firmly into place. If the switch feels "spongy," refuses to stay in the "on" position, or shows visible scorch marks around the terminal screw, it has likely suffered a mechanical failure or an internal short and must be replaced.
Safety should remain the top priority throughout this process.
Test Circuit Breaker Voltage With a Multimeter (Power On)
This method checks whether the breaker is delivering voltage to the circuit.
If the breaker is tripped, switch it fully to the OFF position, then back to ON. If it immediately trips again after several attempts, stop testing and do not continue resetting it. Repeated resetting may indicate a serious downstream fault.
A tripped breaker typically rests between the ON and OFF positions, making it easier to identify its status, as illustrated below.

Steps
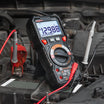
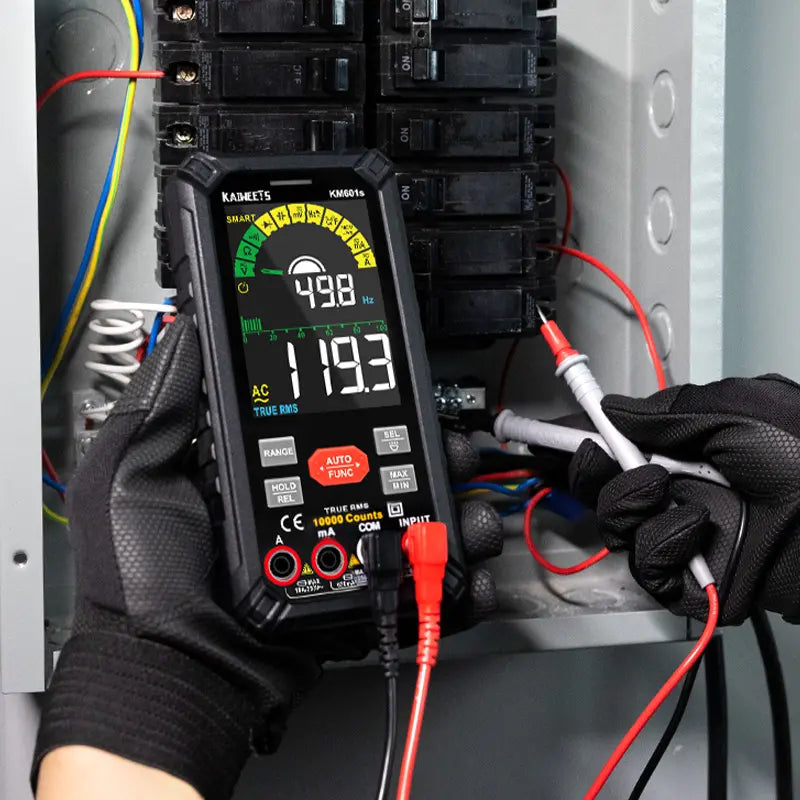
- Set the multimeter to AC voltage with a range suitable for household voltage.
- Place the black test lead on a grounding screw or grounding bar inside the panel.
- Place the red test lead on the screw terminal of the circuit breaker.

Interpreting the results
- A properly functioning single-pole breaker should read approximately 120 volts.
- A properly functioning double-pole breaker should read approximately 240 volts.
- A reading of 0 volts, assuming proper grounding and that the breaker is fully ON, indicates the breaker is likely faulty.
If no voltage is present, turn off power before replacing the breaker.
Continuity Testing in a Circuit Breaker With a Multimeter (Power Off)
Continuity testing is safer than live voltage testing but must only be performed with power fully shut off. Accessing both terminals typically requires removing the circuit breaker from the panel.
Steps
- Turn off the main breaker supplying the panel.
Switching off the main breaker disconnects branch circuits, but it does not remove voltage from all components inside the panel. The incoming service conductors and their connection points may remain energized.
- Confirm that power is off using a non-contact voltage tester on the panel and breaker terminals.
- Remove the circuit breaker from the panel following the manufacturer’s design. Do not force the breaker, and avoid contact with any exposed conductors.
- Set the multimeter to the continuity setting (often represented by a sound wave icon) or the lowest ohms (Ω) setting.
- Touch one probe to the terminal screw (where the wire connects) and the other probe to the bus bar contact on the back of the breaker.
Expected results
- In the "ON" position: The meter should beep or show a resistance near 0Ω.

- In the "OFF" position: The meter should show "OL" (Open Loop), indicating no electrical path.

Failure to meet these conditions suggests internal damage or worn contacts.
How Do I Know if a Circuit Breaker Needs to Be Replaced?
The table below summarizes common test results and what they indicate.
Summary of Multimeter Test Results
| Test Result | What It Means | Recommended Action |
|---|---|---|
| Correct voltage present (120V / 240V) | Breaker is delivering power | Proceed to continuity testing |
| No voltage output while breaker is ON | Breaker is not supplying power | Replace the circuit breaker |
| Continuity present when OFF | Breaker contacts are not opening | Replace the circuit breaker |
| No continuity when ON | Breaker contacts are not closing | Replace the circuit breaker |
| Voltage and continuity both test normal | Breaker is likely functioning correctly | Inspect wiring, connected devices, or circuit load |
Even if test results appear acceptable, physical signs of damage should not be ignored. A circuit breaker should be replaced if you observe:
- Discoloration or scorch marks
- Cracks in the housing
- A burning odor
- Loose parts or rattling sounds when gently moved
- Buzzing or humming during operation
Circuit breakers are not designed to be repaired. Replacement is typically the safest and most reliable solution when these signs are present.
If a breaker tests normal and shows no visible damage, but electrical problems persist, the fault may be in the wiring, connected devices, or the circuit itself rather than the breaker.
How to Test a Circuit Breaker Without a Multimeter
If a multimeter is not available, a few basic checks can still be performed to identify obvious issues.
- Use a non-contact voltage tester to confirm whether voltage is present at the breaker output.
- Observe breaker behavior, such as immediate tripping or failure to reset.
- Check for visible damage, overheating, or unusual sounds.
These methods cannot assess internal breaker condition with the accuracy of a multimeter, but they may help identify obvious problems.
Final Notes
Testing a circuit breaker with a multimeter is an effective way to diagnose electrical problems and determine whether a breaker is operating as intended. Voltage testing verifies output under power, while continuity testing confirms internal connectivity when power is off.
Always follow proper safety procedures and use appropriately rated tools. When results are unclear or conditions appear unsafe, consulting a licensed electrician remains the best course of action.
FAQ
Is it safe to test a circuit breaker yourself?
Testing a circuit breaker involves potential exposure to live electrical voltage. While basic testing can be performed safely with proper tools and precautions, it may not be suitable for everyone. If you are unsure about identifying live wires, working inside an electrical panel, or interpreting multimeter readings, consult a licensed electrician.
What is the 80% rule for circuit breakers?
The 80% rule is a general guideline for continuous electrical loads. It recommends that a circuit breaker should not be loaded beyond 80% of its rated capacity for extended periods.
For example, a 15-amp breaker is typically limited to about 12 amps for continuous use, and a 20-amp breaker to about 16 amps. Exceeding this limit can cause a breaker to trip even when it is functioning normally, which is why disconnecting loads is an important first step when troubleshooting repeated trips.
How can you tell if a circuit breaker is bad using a multimeter?
A circuit breaker may be faulty if it fails either of the following tests:
- It does not supply the correct voltage when switched ON
- It does not show proper continuity when power is turned OFF
If a breaker remains in the ON position but shows no output voltage, or fails continuity testing, replacement is recommended.
What multimeter setting should be used to test a circuit breaker?
- Use the AC voltage setting when checking for power at the breaker output
- Use the continuity or resistance (ohms) setting when testing the breaker with power turned off
Always confirm the meter is set correctly before making contact with terminals.
Dig deeper:
GFCI vs Circuit Breaker: Understanding the Difference
How to Find the Breaker for Water Heater
How to Find a Doorbell Breaker
Leave a comment
All comments are moderated before being published.
This site is protected by hCaptcha and the hCaptcha Privacy Policy and Terms of Service apply.