


Christmas is a time for family, friends, and of course, Christmas lights. While we all love to see the Christmas lights shining brightly in our windows and around our homes, sometimes they can stop working. With this simple guide, you'll be able to get your lights back up and running in no time. Happy holidays!
What usually causes Christmas lights to stop working?
Most Christmas light failures happen because the circuit is no longer complete. The problem is often one of these:
- A blown fuse inside the plug
- A loose or burned-out bulb
- A damaged wire, plug, or socket
Older incandescent light strings are more likely to fail when one bulb opens the circuit. Many LED strings are built differently, so one bad LED may affect only part of the strand. Either way, the first step is to find where the circuit has opened.
If the lights failed after being used outdoors, check the rating on the tag before testing further. Indoor-only lights should not be used where rain, snow, or standing moisture can reach them.
What tools do you need to check Christmas lights?
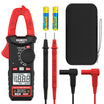
A digital multimeter is the main tool you need. A few small replacement parts can make the repair easier if the string is still safe to use.
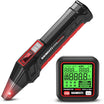
Digital multimeter
Use a multimeter with continuity mode or resistance mode. Continuity mode is easier because the meter usually beeps when it finds a complete path. If you are new to multimeters, this multimeter basics guide can help you understand the settings before you test your Christmas lights.
Replacement fuses and bulbs
Use only the fuse or bulb type listed on the light string label. Mixing parts with the wrong rating can make the string unsafe.
Bulb puller or small plastic tool
A bulb puller helps remove small bulbs without twisting the socket. Avoid using metal tools inside the socket.

How do you test Christmas lights with a multimeter?
Start with the lights unplugged, then work from the plug toward the section that is not lighting. This keeps the process safer and helps you avoid replacing good parts.
Step 1: Inspect the light string before using the meter
A visual check can tell you when the light string should be replaced instead of repaired. Do not continue testing if you see exposed wire, melted plastic, or a loose plug blade.
Also check the product tag. Outdoor decorations should be marked for outdoor use, and outdoor outlets should be protected by a GFCI. The Electrical Safety Foundation International recommends inspecting lights and extension cords before use, and turning decorations off before leaving home or going to sleep.
Step 2: Test the plug fuse
A good fuse should show continuity. A blown fuse usually shows an open circuit.
- Unplug the Christmas lights from the outlet.
- Open the small fuse cover on the plug.
- Remove the fuse carefully.
- Set your multimeter to continuity mode.
- Touch one probe to each end of the fuse.
If the meter beeps or shows a very low resistance reading, the fuse is likely good. If the meter shows OL, open, or no beep, replace the fuse with the same rating listed on the plug or tag.
Many seasonal light strings use plug fuses for overcurrent protection. The U.S. Consumer Product Safety Commission notes that holiday lighting products without proper wire size, strain relief, or overcurrent protection can present a shock or fire risk.
Step 3: Check the light string for continuity
Continuity testing helps confirm whether the circuit path through the string is complete.
- Keep the light string unplugged.
- Make sure the fuses are installed.
- Set the multimeter to continuity mode.
- Touch the probes to the two plug blades.
- Watch for a beep or a low resistance reading.
If the meter shows continuity, the main circuit path is probably complete. If it shows an open circuit, the problem may be a fuse, bulb, socket, or damaged wire.
LED Christmas lights may not always give the same clear continuity reading as older incandescent strings. If your LED string does not beep, use the meter result together with a careful visual check.
Step 4: Check loose or failed bulbs
A loose bulb can open the circuit, so reseat bulbs before replacing them.
- Unplug the lights.
- Start near the first dark section.
- Press each bulb gently into its socket.
- Look for blackened glass or broken bulb leads.
- Replace suspect bulbs with the correct type.
For removable incandescent bulbs, you can test a bulb by touching the multimeter probes to the small metal leads at the base. A working bulb usually shows continuity. A failed bulb usually reads open.
Do not force LED bulbs out of sealed sockets. If the socket is sealed or molded, follow the manufacturer’s instructions instead.

Step 5: Decide whether the string should be replaced
Replace the light string if the damage affects the cord, plug, or socket body. These parts are not worth patching on a factory-made holiday light string.
You should also replace the string if it trips a breaker, smells hot, or works only when the wire is bent a certain way. Those signs point to a deeper electrical fault.
What multimeter setting should you use for Christmas lights?
Use continuity mode first, or use the lowest resistance range if your meter does not have continuity mode. Both settings help you check whether electricity has a complete path through the part you are testing.
On many meters, continuity mode uses a sound symbol. If the circuit is complete, the meter beeps. In resistance mode, a very low reading usually means the path is complete, while OL or infinite resistance means the circuit is open.
Do not use continuity mode on a powered light string. A powered circuit can damage the meter and create a shock risk.
Can you test LED Christmas lights the same way?
You can use the same safety approach, but LED strings may not behave like older incandescent strings on a continuity test. Internal components can make the meter reading less straightforward.
LED holiday lights are still worth considering because they use less electricity and run cooler than incandescent lights. The U.S. Department of Energy notes that LED holiday lights are cooler to the touch and more resistant to breakage.
For LED strings, focus first on the plug fuse, loose sockets, and visible damage. If the string is sealed and the failed section cannot be isolated, replacement is usually the safer choice.
What safety rules matter before repairing holiday lights?
Safety comes before troubleshooting. If the light string shows physical damage, stop using it.
- Unplug the lights before changing bulbs or testing continuity.
- Use outdoor-rated lights for outdoor displays.
- Plug outdoor decorations into GFCI-protected outlets.
- Turn decorations off before leaving home or going to sleep.
- Follow the label limit for connecting multiple strings.
- Replace damaged cords instead of taping over them.
Certification marks also matter. UL Solutions explains that indoor-only decorative light strings use a green UL holographic label, while indoor/outdoor strings use a red UL holographic label. Always follow the marking on your own product, since the rating tells you where the lights are intended to be used.
Related Questions
How should I set my multimeter to test Christmas lights?
Set your multimeter to continuity mode when checking a fuse, bulb, or unplugged light string. If your meter does not have continuity mode, use the lowest ohms setting.
A beep or low resistance reading usually means the circuit path is complete. OL, open, or infinite resistance usually means the path is broken.
Can a digital multimeter be used to test Christmas lights?
Yes, a digital multimeter can be used to test Christmas lights, but only in the correct mode. Use continuity or resistance mode when the lights are unplugged.
Do not use a basic continuity test on a live outlet or powered light string. If you need to test household voltage, use the AC voltage setting and follow the meter’s safety instructions.

Why do Christmas lights stop working?
Christmas lights stop working when the circuit is interrupted. A blown fuse, loose bulb, or damaged wire can all cause that break.
If only one section is dark, start near the first bulb in that section. If the whole string is off, test the plug fuse first.
Should I cut Christmas lights to find the broken wire?
No, you should not cut a factory-made Christmas light string during normal troubleshooting. Cutting the wire can create a shock or fire hazard if the string is repaired incorrectly.
If the wire itself is damaged, replacing the string is usually the safer solution.
When should I stop troubleshooting and replace the lights?
Stop troubleshooting when the light string has visible damage or signs of overheating. A multimeter can help find an open circuit, but it cannot make damaged insulation safe again.
Replacement is also the better choice when the sockets are sealed and the failed section cannot be repaired according to the manufacturer’s instructions.
Conclusion
Testing Christmas lights with a multimeter is simple when you follow the right order. Start with the fuse, check continuity, and then look for loose or failed bulbs.
The most important rule is to test only when the light string is unplugged. If you find damaged wire, melted plastic, or a loose socket, replace the lights instead of trying to keep them in service.

Leave a comment
All comments are moderated before being published.
This site is protected by hCaptcha and the hCaptcha Privacy Policy and Terms of Service apply.