A multimeter is a necessary tool when testing a motherboard. You can ensure that the motherboard is receiving the correct amount of power by testing its voltage. You should also check for shorts and leaks. We'll learn how to use a multimeter to test your motherboard and make sure it's in good working condition. Here's a step-by-step guide to using a multimeter to test a motherboard:
How to tell if your motherboard is in good condition?
You should check the condition of your motherboard regularly to ensure optimal performance and avoid any potential damage. There are a few key indicators that can help you determine whether or not your motherboard is in good condition.
One of the most important things to look for is evidence of physical damage. If there are any cracks, scratches, or other signs of wear and tear, this could be an indication that the motherboard is not in good condition. You should also check for any loose components or connectors. If anything looks out of place, it could be a sign that the motherboard needs to be replaced.
Another thing to look for is corrosion. This is especially common on older motherboards and can lead to serious problems if left unchecked. If you see any corrosion, it's best to replace the motherboard as soon as possible.
Finally, you should also make sure that all of the connections on the motherboard are secure. If any of the plugs or connectors are loose, it could cause problems with the performance of your computer. Make sure to check all of the connections regularly to ensure that they are tight and secure.
By following these simple tips, you can help ensure that your motherboard is in good condition and will last for many years to come. Regular maintenance and inspection is the best way to keep your motherboard in good shape and avoid any potential problems.
How to test the voltage of your motherboard?
If your computer is having issues starting up, or if it's randomly crashing, it could be due to a problem with the voltage on your motherboard. Testing the voltage is a relatively simple process that can be done at home. All you need is a multimeter, which you can purchase at any online store like Amazon. Once you have your multimeter, follow these steps:
- Disconnect all power sources from your computer. This includes the power cord from the wall, as well as any batteries in the case.
- Find the 20-pin ATX power connector on your motherboard. This is usually located near the top of the board.
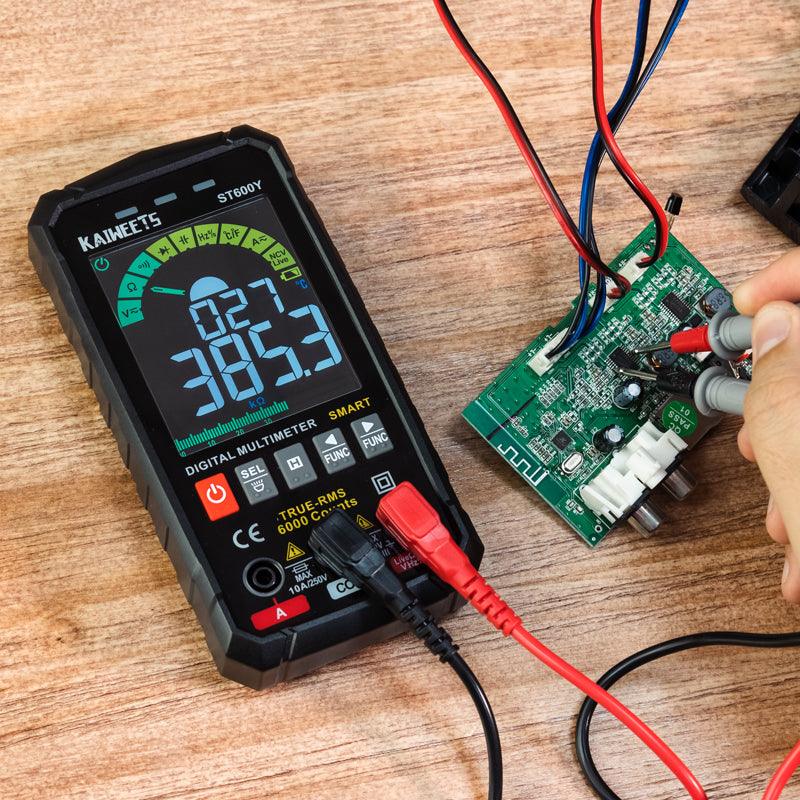
- Set your multimeter to the DC voltage setting and touch the red lead to the positive terminal of the power connector. Touch the black lead to one of the ground terminals.
- You should see a reading of volts on the display. If you don't, check your connections and make sure you're touching the leads to the correct terminals.
- Repeat steps 3 and 4 for the other voltage readings.
- If all of the readings are within the normal range, then your motherboard is likely not the cause of your computer's issues. If one or more of the readings is outside of the normal range, then there could be a problem with your motherboard and you should take it to a qualified technician for further diagnosis.
Testing the voltage of your motherboard is a simple and easy way to rule out hardware problems as the cause of your computer's issues. If you don't feel comfortable doing it yourself, take your computer to a qualified technician and they can test the voltage for you.
How to test the capacitors on your motherboard?
If your computer is acting up, it might be due to a faulty capacitor. These components are responsible for storing electrical energy and releasing it when needed, and if they're damaged, they can cause all sorts of problems.
Luckily, it's relatively easy to test whether or not your capacitors are working properly. All you need is a multimeter and a few minutes.
First, identify the capacitors on your motherboard. They will be cylindrical and will usually have "CAP" written on them. Once you've located them, set your multimeter to the ohms setting and touch the probes to the leads on either end of the capacitor.
If the reading is infinite, that means the capacitor is open and needs to be replaced. If the reading is zero, that means the capacitor is shorted and also needs to be replaced.
If you get a reading somewhere in between those two values, that means the capacitor is good and doesn't need to be replaced.
Once you've determined which capacitors need to be replaced, you can order new ones from an electronics store or online. Just make sure to get the correct type and size for your motherboard.
With a few simple tools and a bit of know-how, you can easily test your motherboard's capacitors and ensure that they're in good working condition.
How to Testing Motherboard for Short Circuits?
There are a few ways to test for short circuits on a motherboard. The most common way is to use a multimeter, which will be able to measure the continuity between two points. Another way is to use an ohmmeter, which measures the resistance between two points.
If you're using a multimeter, you'll want to set it to the "continuity" setting and touch the probes to two points on the motherboard that you think maybe shorted together. If the multimeter beeps or shows a low resistance reading, then there is a short circuit between those two points.
If you're using an ohmmeter, you'll want to set it to the highest setting and touch the probes to two points on the motherboard that you think maybe shorted together. If the ohmmeter shows a low resistance reading, then there is a short circuit between those two points.
You can also use a visual inspection to look for signs of burning or charring on the motherboard. This is an indication that there was a short circuit at some point and that damage has occurred.
Once you've determined that there is a short circuit on the motherboard, you'll need to determine what caused it and how to fix it. Short circuits can be caused by damaged components, loose connections, or incorrect wiring. If you're not sure what caused the short circuit, it's best to seek professional help so that the issue can be resolved safely.

Frequently Asked Questions:
What is the typical average lifespan of a motherboard?
A motherboard's average lifespan ranges from 15 to 20 years. However, motherboards are known to last much longer than that. If you take care of your motherboard and keep it clean, it will likely last even longer. So, the answer to the question of how long your motherboard will last is: it depends. However, with proper care, you can expect your motherboard to last for many years.
Is it possible to repair a motherboard?
The answer to this question depends on the extent of the damage. If the motherboard is only slightly damaged, it may be possible to repair it. However, if the damage is severe, it may not be possible to repair the motherboard and you may need to replace it entirely.
If you are trying to repair a motherboard yourself, it is important to be aware that this can be a difficult and potentially dangerous task. It is advisable to seek professional help if you are not confident in your ability to safely repair a motherboard.
How do you check for a short circuit on a motherboard?
Checking for a short circuit on a motherboard is a relatively simple process that can be done with a multimeter.
First, you will want to power down the computer and unplug all of the cables.
Next, locate the suspicious area on the motherboard and use the multimeter to test the continuity between the two points. If there is no continuity, then there is likely a short circuit present.

Conclusion:
In Conclusion, testing a motherboard with a multimeter is a relatively easy process that can be done by following a few simple steps. By testing the various components of the motherboard, you can ensure that it is functioning properly and identify any potential problems. With a little bit of patience and attention to detail, you can keep your motherboard in top condition for years to come.
























Leave a comment
All comments are moderated before being published.
This site is protected by hCaptcha and the hCaptcha Privacy Policy and Terms of Service apply.